Wednesday, April 23, 2025

Ec2 part2

Ec2 part2

 Class 10th Elastic compute cloud Apr 23rd

  • Load Balancer 
  • Target groups
  • Launch Templates 
  • Auto scaling

Step1: VPC Created
Created One VPC  with CIDR block 10.0.0.0/22 that means 32-22=10  ,Power(2,10)=1024 Subnet Ips we can able create


Step2:We have created 6 subnets 3 for public and 3 for private for above VPC, with different available zones.

Step3:Create two route table private/public subnet attached to associate subnets


Step4:Click  all your public and private subnet edit subnet check enable auto-assign public and save
Step5: Need to create one internet gateway and attached our VPC


Step6:
What is the ELB?
Elastic load balancing automatically distributes incoming application traffic access multiple targets,such as amazon instances,container, IP addresses,lambda functions and virtual appliances.

https://google.com search(user)-->Webserver-->database 
Web server has capacity limited(if request came more than capacity system will crash,so the reason implemented load balancer
user -->loadbalacer->Webserver -->Webserver -->database
                                     
the load balancer equal to distributed multiple webserver instances

Elastic Load balancing types 
1.Application load balancer (commonly used ,round robin method distribute)
2.Network load balancer 
3.Gateway load balancer 
4.Classic load balancer (old one)

Target groups :we have registered instance to the target group which is you have created
Target groups route requests to one or more registered targets, such as ec2 instances, using the protocol and port number that you specify.
You can register a target with multiple target groups. You can configure health checks on  a per targetgroup basis.
Health checks are performed on all registered to a target group that is specified in a listener rule for your load balancer

Practical
Step7: Need to attach internet gateway to private /public Route table also.


Step8:We have to three instance created,


Step9: Advance details and scrip user data Apache data  and click launch
#!/bin/bash -xe

# STEP1 -Updates
yum -y update

# STEP2 -Begin Configuration
yum -y install httpd
systemctl enable httpd
systemctl start httpd

# STEP3 -Customer Web Page
echo "<h1> Welcome to Website1</h1>" >> /var/www/html/index.html


Step10: Three instances created with three different zone due high availability 
VM_Inst_website1,VM_Inst_website2,VM_Inst_website3 and modify iam security attach admin for all 3 VM's

Step11:


Step12:Need to Create Target group and attached 


Our three instance check all click include as pending as below
and click create target group

After registered Target group inital it will consequently health check ,while health 200 success code need get response, if not our instance is not healthy
Every 30 seconds target do the health for the instance if any issue on instance that server went to
 unhealth state


Create Load balancer  Application Load Balancer 
Step1:

          
select default security group and ,select out Target group

Click load balancer


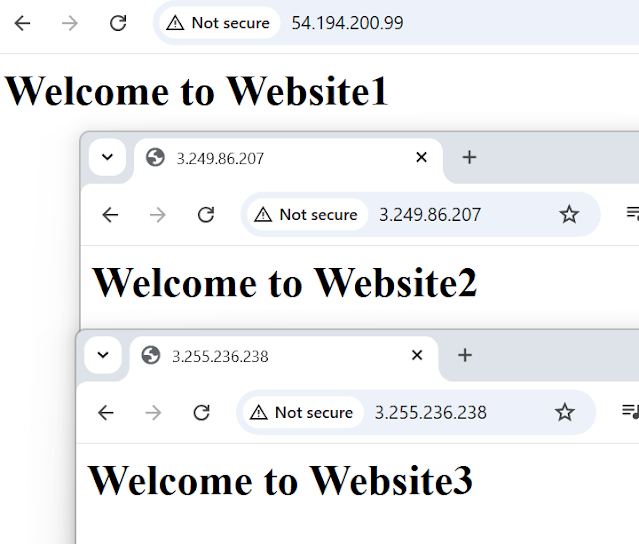
Step2: Take the DNS name CCIT-LBCER-137143466.eu-west-1.elb.amazonaws.com load balancer test,
as you see below same website url connected ,different sites, this way load balancer will work


Step3: Just for test stop the one instance and then need to target group available zone


Step4:As you see below one avaaille zone went unsed state 
Step5:Even though our website available to two zone


                                                                           Autoscaling
(whenevery one instance was down, autscaling automatically create on instance and attach to target gropd)
Autoscaling is monitoring your applications automatically adjust the capacity to maintain steady, predicatable performance at the lowest possible cost.
Using AWS auto scaling, it's easy to setup application scaling for multiple resources across multiple service in minutes 
It's easy to get stared with auto scaling using the AWS management console,command line interface (CLI), or SDK 
AWS Auto scaling is available at no additional charge .You pay only of the AWS resources needed to run your applications and amazon cloud watch monitoring fees.

Type of Scaling 
  • Vertical Scaling  
  •  Horizontal Scaling 
Vertical scaling means increasing the capacity of the existing resource .Increasing RAM capacity, adding additional volumes, change  the instance family under this category 
Note: Vertical scaling need change capacity for instance need downtime/stop instance

Horizontal 
(For Particular time you want required instance capacity need to increase with out downtime ,we implement Horizontal downtime)
Horizontal scaling means adding additional nodes or machines to your infrastructure as per demand. 
we can setup automation to this scaling.

Launch Template 
Create Template  choose the instance type t2.micro free tier 

Additional details,pls User data give below information 

#!/bin/bash -xe

# STEP1 -Updates
yum -y update

# STEP2 -Begin Configuration
yum -y install httpd
systemctl enable httpd
systemctl start httpd

# STEP3 -Customer Web Page
echo "<h1> Welcome to Blog</h1>" >> /var/www/html/index.html

 
Not to change anything click Create lunch template

Step6: Need to configure auto scaling group need attach the launch template which is we have created
autoscaling create the instance based which specified on the launch template
Click Next


Choose your VPC and select all private subnet click next 

Attach your existing loadbalancer 

click Next 

Enter how many instances you need 

Give 3 click next >add notification >click next -->add tag >click next 

Step7:

Click create autoscaling group

Once create Autoscaling group ,Three instance automatically created 

As you above it was created three availability zones, we have specified launch template 
and autoscaling show three availability zones
As you see using public IP , all http pages are opened 


All Instance we have put private, we have put only loadbalacer public 

As see Target groups are health state.


Test Auto scaling now, terminate one instance manually , need check is will automatically create instance or not using autoscaling 

Terminate one instance 

 Terminated done 


You see automatically one more instance created by autoscaling ,After 300 seconds


 You see our webpage all also automatically came ,autoscaling created instance with same configuration and out webpage
Below out autoscaling min once created max 3 instance automatically


Autoscaling ,We can Instance CPU utalinzation also based on target value 50 % more, it will create
new instance automatically and distributed the load balance 


Deletion
Terminate the instance 
delete autoscaling 
delete loadbalance
delete targetgroups


                     --Thanks 


Tuesday, April 22, 2025

New VPC Creation

 Create VPC Steps

Step1: Given CIDR 10.0.0.0/24 that means 32-24(8) =power(2,8)=256 Ip's

Step2:
Click Create VPN

After created VPC default one security group and one Route tables created automatically


Step3:Now we need divide the VPC IP's to subnets Public and private for dividing subnets,we have give CIDR range for them separately 
Step4:Create Subnets
  Goto subnet>Click create subnet

  • Select you VCP which created early yar ,every region has 3 available zones (i,e datacenter) you can choose any if not it will take automatically,
  • For subnet we need give ip address range(CIDR) 10.0.0.0 /24 (16-32 rage) (32-24)=8   2 power of 8 =256 IP’s
  • Need to CIDR range for the subnet ip’s which is you go to divide the subnet public and private
  • Netmask: 25 equal shared public and private 

 Created one Subnet as public name

as see here CIDR range block public subnet 128 Ip's automatically splitted


Create one more subnet Private, give same CDIR range for private subnet you see below screen shot getting error  subnet previous we have given public subnet 10.0.0.0/25,  that means
We have these ip for public subnet 10.0.0.0.. 10.0.0.128 reserved ,now already occupied for them,
So we need give different range 10.0.0.128..10.0.0.256

After change CIDR range 10.0.00.128/24 automatically created  Private subnet,Please find the screen shot below

 We have created 256 IP Private subnet(128),Public subnet(128) 


As we see above Available Ips address assigned 123 only128-5(5 was reduced, by Aws for internal requirement in each subnet ,those are all first 4 and last one ip’s) remaining showing 123 available


EC2 Service Aws

 Class 9th S3 Ec2 service   Apr22nd

EC2 Elastic Compute cloud: Simple called it has 2 C, EC2 

What is Ec2?

  • AWS EC2 is a core service within Amazon Web service (AWS) that provides resizable  compute capacity in the cloud.
  • It run from the Ec2 host servers(also called physical servers) residing in the AWS datacenter 
  • These hosts servers are large hardware units that are divide into smaller chunks ,each chunk functions as a virtual server(instance)
  • We can use these host server as shared server or dedicated servers 
  • Users can launch these servers with required OS setup in Pay-as-You-Go model 

Key feature of Ec2
 1.Scalabilty (We can change the Ec2 server whenever required)
 2.Flexibility(We can able upgrade downgrade whenever required)
 3.Customizable (Load balance we can install whatever required) 
 4.Pay-as-you-go pricing (How much you can use pay that much only)
 5.Global reach (We access any where Globally )
 6.Integration with other Aws services (Given permission we will communicate other aws services)

Ec2 Architecture
 Ec2 is region specific ,each region has there availability zone (data center)
 Instance has (Ip address,security group,key value pair)
 Ec2 Free limit per month 750 hrs(12 free)
On-Demand instances :Whenevery you required it will give you new ip
Dedicate Instances: reserved instance for dedicated ip

Amazon Linux:AWS build the own Linux using Linux kernel,All Linux system in AWS Command Window access no GUI Access
Amazon Machine Image(AMI):
  • Used to create/launch the Ec2 instances.
  • AMI are available with various o/s for different requirements 
  • AMI's regional,each AMI Contains a unique ID Which is different form region to region 
  • Users can design own AMI and sell in the AWS market place.
  • AMIs are immutable :once you create an AMI,it remains unchanged, Any changes made to the instance after the AMI Creation won't affect the image.
Amazon Machine Image: AWS Provided, Community, Market place 

VM Creation Steps:
Step1: Choose Amazon Linux ,Generate Keypair you see below RSA, ED25519 more Strong Secure compared to RSA ,RSA will support window/Linux both ED22519 
will support Linux only,Give key pair name "VM-LINUX_FIRST"


.pem file it has private key ,while creating instance it has public key ,both the combination match and it will you authenication password and generate and give you
.ppk is putty based to connect ,third party service you can use
Step2:In the network section need vpc which we created,Auto -assigned public always be enable to connect public ,else Elastic Ip is chargeable


 Linux storage by  default 8 gb ,for Windows 30 gb 
Advance option User data, Placement group not covered 
just click launch instance 

Step3:Connect AWS ,you can use SSH key which you have download 
VM-LINUX_FIRST.Pem key place directory and connect in local cmd prompt 

Ec2-user is default user limited permission 
root - has supermium permission admin for ec2 instance 

                                                   
Simple Website Creation 
Two types of website 1.Static Website (Unchangable), 2.Dynamic Website (dynamical change and store info in Database  level Change in periodically automictically) Now we are static website hosting using Linux instance.

Step1: After launch the instance amazon Linux  for host website need install some software in Linux ,Apache and https package using sudo user

[ec2-user@ip-10-0-0-31 ~]$  sudo yum install httpd

Installed:
  apr-1.7.5-1.amzn2023.0.4.x86_64                                apr-util-1.6.3-1.amzn2023.0.1.x86_64
  apr-util-openssl-1.6.3-1.amzn2023.0.1.x86_64                   generic-logos-httpd-18.0.0-12.amzn2023.0.3.noarch
  httpd-2.4.62-1.amzn2023.x86_64                                 httpd-core-2.4.62-1.amzn2023.x86_64
  httpd-filesystem-2.4.62-1.amzn2023.noarch                      httpd-tools-2.4.62-1.amzn2023.x86_64
  libbrotli-1.0.9-4.amzn2023.0.2.x86_64                          mailcap-2.1.49-3.amzn2023.0.3.noarch
  mod_http2-2.0.27-1.amzn2023.0.3.x86_64                         mod_lua-2.4.62-1.amzn2023.x86_64

Complete!

Step2:After install ,We can the httpd status using command  sudo systemctl status httpd

Step3: using command for start sudo systemctl start httpd checking the status again active and running 
Step4: After installation Apache path default path is  /var/www/html 
If you want launch simple website,the default page is index.html 
After installation httpd, just check public ip is working or not ,it connect direct direct default page (index.html)


See below Default page open successfully
Step5:
[ec2-user@ip-10-0-0-31 html]$ sudo vi index.html
[ec2-user@ip-10-0-0-31 html]$ cat index.html
<h1> Welcome to Blog </h1>
Step6:
Step7: Once you stop instance ,automatically public ip will change and apache httpd will inactive 
you make manually start, Instead of manually start every time  after instance restart 
use below command enabled it will automatically start .

[ec2-user@ip-10-0-0-31 html]$ sudo systemctl enable httpd
Created symlink /etc/systemd/system/multi-user.target.wants/httpd.service → /usr/lib/systemd/system/httpd.service.


                                Instance Image Copy and Launch instance with image
    if you want copy the same Instance image Below Steps
Step1: Select insance >Image and templated and create image
Step2: Just give image name VM-Image Click Create Image ,it will take some time to complete


Step3:Amazon machine image take some time 


Image now available(next time while you want create new instance ,take above image launch the instance the image Apache default), This is help you not required to install same softwares again

Step4:Launch new instance this time using our image 


Note: we can able change Linux version here, you can able to Change network setting and Security key pair and then Click launch the instance 
Step5:See below successfully created new second instance using image it the instance automatically 
has default software apache, just check once default page opened or not using public ip url


Step6:          

Step7: while connect using sshkey copy here see root default need change ec2-user and connect
ssh -i "VM-LINIX-SECOND.pem" root@34.240.205.112
PS C:\Users\Administrator> ssh -i "VM-LINIX-SECOND.pem" root@34.240.205.112
The authenticity of host '34.240.205.112 (34.240.205.112)' can't be established.
ED25519 key fingerprint is SHA256:c6LhEFgi2mMaPT1L3kE2/9dL+a12diUWugaxgzJHcNs.
This key is not known by any other names.
Are you sure you want to continue connecting (yes/no/[fingerprint])? yes
Warning: Permanently added '34.240.205.112' (ED25519) to the list of known hosts.
Please login as the user "ec2-user" rather than the user "root".

Connection to 34.240.205.112 closed.
PS C:\Users\Administrator> ssh -i "VM-LINIX-SECOND.pem" ec2-user@34.240.205.112
Last login: Sat Apr 26 09:50:32 2025 from 5.204.1.73
[ec2-user@ip-10-0-0-101 ~]$

Immutability means after image take any change one instance that change not carry to new instance that is called immutable 
                                    Instance Launch with Condition User data option
                                     install Apache using commands

Step1:Create Instance give name VM-LINIX-THIRD, additonal setting going to User data setting 


After give below lines in the User data section and click launch Instance

#!/bin/bash -xe

# STEP1 -Updates
yum -y update

# STEP2 -Begin Configuration
yum -y install httpd
systemctl enable httpd
systemctl start httpd

# STEP3 -Customer Web Page
echo "<h1> Welcome to Blog VM Third Instance</h1>" >> /var/www/html/index.html


Step2: See here automatically Apache installed and index setup done 


Step3:After completed work need Deregister AMI image which we have created
Click AMIs, due cost related clear that

Thanks