Wednesday, April 30, 2025

Terraform variables

 Terraform variables

Class 15th Terraform Variables Apr 30th(Devops)

Terraform Target and ".tfvars" files

Terraform output block

Terraform import

Terraform Taint and replace

Terraform workspace 

Terraform comments

Creating AWS Resources (VPC,S3 Buket,EC2,EBS and RDS)

                                                                 Variables 

In the .tf file access key and secrete key assign the variable not good practice 

[ec2-user@ip-172-31-35-32 ccit]$ cat  cloudinfra.tf
provider "aws"{
region="eu-west-1"
access_key="AKIATFBMO7H4MQLOWPFY"
secret_key="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"
}
resource "aws_s3_bucket" "ccitbucket"{
  bucket="ccitapril"
}
Step1:
[ec2-user@ip-172-31-35-32 ccit]$ cat cloudinfra.tf
provider "aws" {
  region     = "eu-west-1"
  access_key = "AKIATFBMO7H4MQLOWPFY"
  secret_key = "XENq4+tXP+d2YkSV6BRDWnwu+8Vd6ST1ZlE8Z0bF"
}
resource "aws_s3_bucket" "ccitbucket" {
  bucket = "ccitapril"
}
resource "aws_instance" "ccitinst" {
  ami           = var.inst_ami
  instance_type = var.inst_type
  count         = var.inst_cnt
  tags = {
    Name = var.inst_tag
  }
}
variable "inst_ami" {
  default = "ami-04e7764922e1e3a57"
}
variable "inst_type" {
  default = "t2.micro"
}
variable "inst_cnt" {
  default = 2
}
variable "inst_tag" {
  default = "ccit"
}

Step2: Two instances created successfully 

Bucket created

Step3: you can you the command state list ,we get know what resources are created
and observed below resource showing [0],[1],because we have labeled  resource "aws_instance" "ccitinstsame for two instance same identity with array number,if give uniquely labeled  it will sperate identity
[ec2-user@ip-172-31-35-32 ccit]$ terraform state list
aws_instance.ccitinst[0]
aws_instance.ccitinst[1]
aws_s3_bucket.ccitbucket

Step4: you can destroy the resource ,with inputs also  before modify .tf file all variables empty

variable "inst_ami" {

}
variable "inst_type" {

}
variable "inst_cnt" {

}
variable "inst_tag" {

}
just simple give enter 
[ec2-user@ip-172-31-35-32 ccit]$ terraform destroy -auto-approve
Plan: 0 to add, 0 to change, 3 to destroy.
aws_s3_bucket.ccitbucket: Destroying... [id=ccitapril]
aws_instance.ccitinst[1]: Destroying... [id=i-04bd0311752379056]
aws_instance.ccitinst[0]: Destroying... [id=i-0e19a1b1e8d912d57]
aws_s3_bucket.ccitbucket: Destruction complete after 0s
aws_instance.ccitinst[1]: Still destroying... [id=i-04bd0311752379056, 10s elapsed]
aws_instance.ccitinst[0]: Still destroying... [id=i-0e19a1b1e8d912d57, 10s elapsed]
aws_instance.ccitinst[0]: Still destroying... [id=i-0e19a1b1e8d912d57, 20s elapsed]
aws_instance.ccitinst[1]: Still destroying... [id=i-04bd0311752379056, 20s elapsed]
aws_instance.ccitinst[1]: Still destroying... [id=i-04bd0311752379056, 30s elapsed]
aws_instance.ccitinst[0]: Still destroying... [id=i-0e19a1b1e8d912d57, 30s elapsed]
aws_instance.ccitinst[0]: Still destroying... [id=i-0e19a1b1e8d912d57, 40s elapsed]
aws_instance.ccitinst[1]: Still destroying... [id=i-04bd0311752379056, 40s elapsed]
aws_instance.ccitinst[0]: Destruction complete after 40s
aws_instance.ccitinst[1]: Destruction complete after 40s

Destroy complete! Resources: 3 destroyed.

Step5: We have remove accesskey and secrete key in the couldinfra.tf file ,we plan to attached admin access role to Ec2,if you give admin role to Ec2 machine not required keys, you see below error role not attached to Ec2 machine.

[ec2-user@ip-172-31-35-32 ccit]$ terraform apply -auto-approve
var.inst_ami
  Enter a value: "ami-04e7764922e1e3a57"

var.inst_cnt
  Enter a value: 1

var.inst_tag
  Enter a value: "ccit"

var.inst_type
  Enter a value: "t2.micro"
│ Error: No valid credential sources found
│   with provider["registry.terraform.io/hashicorp/aws"],
│   on cloudinfra.tf line 1, in provider "aws":
│    1: provider "aws" {
│ Please see https://registry.terraform.io/providers/hashicorp/aws
│ for more information about providing credentials.
│ Error: failed to refresh cached credentials, no EC2 IMDS role found, operation error ec2imds: GetMetadata, http response error
│ StatusCode: 404, request to EC2 IMDS failed

Step6:Before as you see Iam role is null ,not having access required to pass keys


Step7: role create EC2-amin ,that role assigned to ec2 machine and click update Iam role
Step8:you see below now Iam role attached 

Step9:
[ec2-user@ip-172-31-35-32 ccit]$ terraform apply -auto-approve -var="inst_ami=ami-04e7764922e1e3a57" -var="inst_type=t2.micro" -var="inst_cnt=1" -var="inst_tag=ccit"
aws_s3_bucket.ccitbucket: Refreshing state... [id=terraform-20250502130858021500000001]
Plan: 1 to add, 0 to change, 0 to destroy.
aws_instance.ccitinst[0]: Creating...
aws_instance.ccitinst[0]: Still creating... [10s elapsed]
aws_instance.ccitinst[0]: Creation complete after 12s [id=i-07cb874dc434c0560]

Apply complete! Resources: 1 added, 0 changed, 0 destroyed.
Step10:ccit instance create successfully
Step11:
[ec2-user@ip-172-31-35-32 ccit]$ terraform destroy -auto-approve -var="inst_ami=ami-04e7764922e1e3a57" -var="inst_type=t2.micro" -var="inst_cnt=1" -var="inst_tag=ccit"

Step12: we can put our variable to different file also variable.tf , we can mentioned our inputs

[ec2-user@ip-172-31-35-32 ccit]$ ls -lrt
total 20
-rw-r--r--. 1 ec2-user ec2-user 7462 May  2 13:31 terraform.tfstate.backup
-rw-r--r--. 1 ec2-user ec2-user  182 May  2 13:31 terraform.tfstate
-rw-r--r--. 1 ec2-user ec2-user  267 May  2 13:35 cloudinfra.tf
-rw-r--r--. 1 ec2-user ec2-user  182 May  2 13:39 variable.tf

Step13:terraform very smart it will take inputs from cloudinfra.tf file  variable automatically
[ec2-user@ip-172-31-35-32 ccit]$ cat variable.tf
variable "inst_ami" {
default="ami-04e7764922e1e3a57"
}
variable "inst_type" {
default="t2.micro"
}
variable "inst_cnt" {
default=1
}
variable "inst_tag" {
  default="CCIT-INST"
}
Step14: see Instance created successfully
[ec2-user@ip-172-31-35-32 ccit]$ terraform apply -auto-approve
Plan: 2 to add, 0 to change, 0 to destroy.
aws_instance.ccitinst[0]: Creating...
aws_s3_bucket.ccitbucket: Creating...
aws_s3_bucket.ccitbucket: Creation complete after 1s [id=terraform-20250502134319274600000001]
aws_instance.ccitinst[0]: Still creating... [10s elapsed]
aws_instance.ccitinst[0]: Creation complete after 12s [id=i-07ff13eb10f4969fc]

Apply complete! Resources: 2 added, 0 changed, 0 destroyed.


Step15: you see above created two resouce , given aws bucket is give empty ,it create bucket name default some name:
[ec2-user@ip-172-31-35-32 ccit]$ cat cloudinfra.tf
provider "aws" {
  region     = "eu-west-1"
}
resource "aws_s3_bucket" "ccitbucket" {
}
resource "aws_instance" "ccitinst" {

  ami           = var.inst_ami
  instance_type = var.inst_type
  count         = var.inst_cnt

  tags = {
    Name = var.inst_tag
  }
}

  Terraform varfiles
Step1: create these below file and make variable.tf null all variables
.tfvars 

vi dev.tfvars

inst_ami="ami-04e7764922e1e3a57"
inst_cnt="t2.micro"
inst_type=1
inst_tag="CCIT-DEV"

vi test.tfvars

inst_ami="ami-04e7764922e1e3a57"
inst_type="t2.micro"
inst_cnt=1
inst_tag="CCIT-test"

vi prod.tfvars
inst_ami="ami-04e7764922e1e3a57"
inst_type="t2.micro"
inst_cnt=1
inst_tag="CCIT-prod"

Step2: passing the inputs to var file to the command,see dev instance created successfully
[ec2-user@ip-172-31-35-32 ccit]$ terraform apply -auto-approve -var-file="dev.tfvars"

Step3:
[ec2-user@ip-172-31-35-32 ccit]$ terraform destroy -auto-approve -var-file="test.tfvars"
Destroy complete! Resources: 1 destroyed.

Note: Better maintenance, we have split the variable declaration separate files ,instead of maintained in cloudinfra.tf single file .tf file terraform it will take consideration
        
                                                  Output block
[ec2-user@ip-172-31-35-32 ccit]$vi coudinfra.tf 
esc :set number (display numbers for file)
      :d 10 (where your cursor ,botton all 10 lines deleted)

Step1: Output block use for want to know what creation done ,log information 
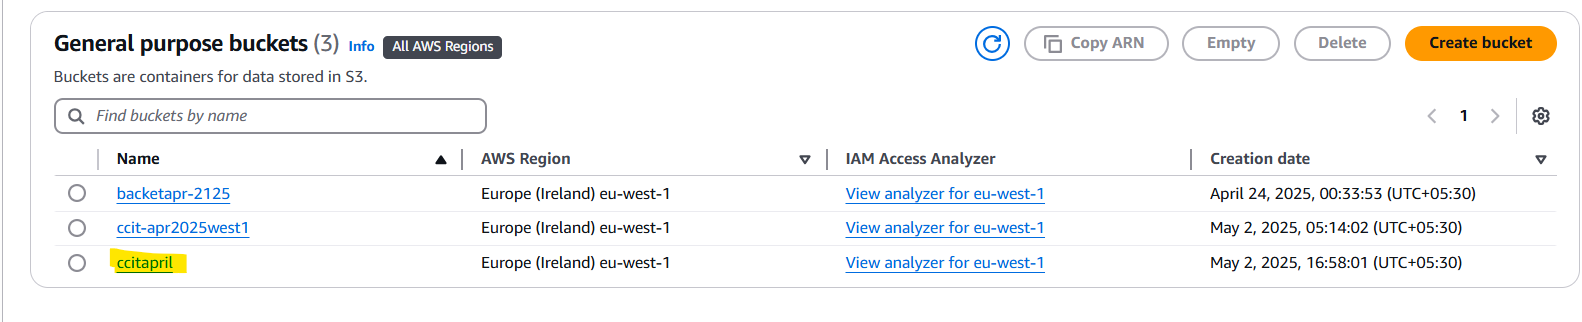
Step2: bucket created successfully you see the output of the bucket
[ec2-user@ip-172-31-35-32 ccit]$vi coudinfra.tf 
provider "aws" {
  region  = "eu-west-1"
}
provider "aws" {
  alias = "west2"
  region  = "eu-west-2"
}
resource "aws_s3_bucket" "ccitwest1bucket" {
  provider = aws
  bucket = "ccit-apr2025west1"
}
resource "aws_s3_bucket" "ccitwest2bucket" {
  provider = aws.west2
  bucket = "ccit-apr2025west2"
}
output "ccitoutblock" {
value = {
  bucket=aws_s3_bucket.ccitwest1bucket.bucket
  }

[ec2-user@ip-172-31-35-32 ccit]$ terraform apply -auto-approve
Plan: 2 to add, 0 to change, 0 to destroy.
aws_s3_bucket.ccitwest2bucket: Creating...
aws_s3_bucket.ccitwest1bucket: Creating...
aws_s3_bucket.ccitwest1bucket: Creation complete after 1s [id=ccit-apr2025west1]
aws_s3_bucket.ccitwest2bucket: Creation complete after 1s [id=ccit-apr2025west2]

Apply complete! Resources: 2 added, 0 changed, 0 destroyed.

Outputs:
ccitoutblock = {
  "bucket" = "ccit-apr2025west1"
}

Step3: arn display for the bucket 

output "ccitoutblock" {
value = {
  bucket = aws_s3_bucket.ccitwest1bucket.bucket
  arn = aws_s3_bucket.ccitwest1bucket.arn
  region = aws_s3_bucket.ccitwest1bucket.region
  }
Outputs:

ccitoutblock = {
  "arn" = "arn:aws:s3:::ccit-apr2025west1"
  "bucket" = "ccit-apr2025west1"
  "region" = "eu-west-1"
}

Step4: For two output block buckets
output "ccitoutblock" {

value = {
  bucket = aws_s3_bucket.ccitwest1bucket.bucket
  arn = aws_s3_bucket.ccitwest1bucket.arn
  region =  aws_s3_bucket.ccitwest1bucket.region
 }
 }
output "ccitoutblock1" {
value = {
  bucket = aws_s3_bucket.ccitwest2bucket.bucket
  arn = aws_s3_bucket.ccitwest2bucket.arn
  region =  aws_s3_bucket.ccitwest2bucket.region
 }
 }
 Import 
Step1: import option which you have created bucket manually inform to terraform take control for the bucket using import 
Step2:see here i have enter destory only two buckets destory there is no control to which is we have created manually
[ec2-user@ip-172-31-35-32 ccit]$ terraform destroy -auto-approve
aws_s3_bucket.ccitwest1bucket: Refreshing state... [id=ccit-apr2025west1]
aws_s3_bucket.ccitwest2bucket: Refreshing state... [id=ccit-apr2025west2]
Plan: 0 to add, 0 to change, 2 to destroy.
aws_s3_bucket.ccitwest1bucket: Destroying... [id=ccit-apr2025west1]
aws_s3_bucket.ccitwest2bucket: Destroying... [id=ccit-apr2025west2]
aws_s3_bucket.ccitwest1bucket: Destruction complete after 1s
aws_s3_bucket.ccitwest2bucket: Destruction complete after 1s

Destroy complete! Resources: 2 destroyed.

Step3: after apply two Buckets are created  again 
Step4: need to check state of the terraform file using command ,you see below terraform control has only two buckets

[ec2-user@ip-172-31-35-32 ccit]$ terraform state list
aws_s3_bucket.ccitwest1bucket
aws_s3_bucket.ccitwest2bucket

Step5: Added details of the manually bucket which is created 
[ec2-user@ip-172-31-35-32 ccit]$ vi cloudinfra.tf

provider "aws" {
  alias="west1"
  region  = "eu-west-1"
}
provider "aws" {
  alias = "west2"
  region  = "eu-west-2"
}
resource "aws_s3_bucket" "ccitwest1bucket" {
  provider = aws
  bucket = "ccit-apr2025west1"
}
resource "aws_s3_bucket" "ccitwest2bucket" {
  provider = aws.west2
  bucket = "ccit-apr2025west2"
}

resource "aws_s3_bucket" "ccitwest1manually" {
  provider = aws.west1
  bucket = "ccit-apr2025west-manually"

Step6: See here imported successfully
[ec2-user@ip-172-31-35-32 ccit]$ terraform import aws_s3_bucket.ccitwest1manually ccit-apr2025west-manually
aws_s3_bucket.ccitwest1manually: Importing from ID "ccit-apr2025west-manually"...
aws_s3_bucket.ccitwest1manually: Import prepared!
  Prepared aws_s3_bucket for import
aws_s3_bucket.ccitwest1manually: Refreshing state... [id=ccit-apr2025west-manually]

Import successful!

The resources that were imported are shown above. These resources are now in
your Terraform state and will henceforth be managed by Terraform.      
  
Step7: After import  state of the terraform 
[ec2-user@ip-172-31-35-32 ccit]$ terraform state list
aws_s3_bucket.ccitwest1bucket
aws_s3_bucket.ccitwest1manually
aws_s3_bucket.ccitwest2bucket
Step8: three buckets destroyed 
[ec2-user@ip-172-31-35-32 ccit]$ terraform destroy -auto-approve
aws_s3_bucket.ccitwest2bucket: Destroying... [id=ccit-apr2025west2]
aws_s3_bucket.ccitwest1bucket: Destroying... [id=ccit-apr2025west1]
aws_s3_bucket.ccitwest1manually: Destroying... [id=ccit-apr2025west-manually]
aws_s3_bucket.ccitwest2bucket: Destruction complete after 1s
aws_s3_bucket.ccitwest1bucket: Destruction complete after 1s
aws_s3_bucket.ccitwest1manually: Destruction complete after 0s

Destroy complete! Resources: 3 destroyed.
Step9:After apply
[ec2-user@ip-172-31-35-32 ccit]$ terraform apply -auto-approve
[ec2-user@ip-172-31-35-32 ccit]$ terraform state list
aws_s3_bucket.ccitwest1bucket
aws_s3_bucket.ccitwest1manually
aws_s3_bucket.ccitwest2bucket
Step10:  Remove particular bucket 
[ec2-user@ip-172-31-35-32 ccit]$ terraform state rm aws_s3_bucket.ccitwest1manually
Removed aws_s3_bucket.ccitwest1manually
Successfully removed 1 resource instance(s).
Step11: removed from terraform state but bucket there physically
[ec2-user@ip-172-31-35-32 ccit]$ terraform state list
aws_s3_bucket.ccitwest1bucket
aws_s3_bucket.ccitwest2bucket

                 Tait and replace 

Step1: Created one VM 

[ec2-user@ip-172-31-35-32 ccit]$ cat cloudinfra.tf
provider "aws" {
  alias = "west1"
  region  = "eu-west-1"
}

resource "aws_instance" "ccitinst" {

  ami="ami-04e7764922e1e3a57"
  instance_type="t2.micro"
  count=1
  tags ={
        Name ="CCITINST"
   }
}

Step2: taint command for if any case destroyed or corrupted our instance CCINST, immediately
you need instance use the command with same confirgure to create VM use  tait, but whatevery inside files of the VM not come, only instance will create

taint is old  replace new one 

Step3: you see below state list has one instance which was corrupted you want taint for the instance use the command ,it will destory the existing one create new one  data will not come 

[ec2-user@ip-172-31-35-32 ccit]$ terraform state list
aws_instance.ccitinst[0]

Step4: See here taint mark added for the server 
[ec2-user@ip-172-31-35-32 ccit]$ terraform taint aws_instance.ccitinst[0]
Resource instance aws_instance.ccitinst[0] has been marked as tainted.

Step5: you see below one terminated with same name created one more instance 
[ec2-user@ip-172-31-35-32 ccit]$ terraform apply -auto-approve


Step6:Replace will directly, replace instance on top the instance not required taint mark 
[ec2-user@ip-172-31-35-32 ccit]$ terraform apply -auto-approve -replace="aws_instance.ccitinst[0]"


                                                       Comments 
 Note:-Need to do carefully ,if you put resouce block comment any unnessary after apply resoue will destroy 

  Single line comment  # count=0 or  // count=0
  Multiple line comments  /*count=0 
                                               Name ="ccit" */

                                                                  --Thanks 


Tuesday, April 29, 2025

Terraform AWS Provider

Terraform 

Class 14th Terraform Apr 29th (Devops):
How many ways to AWS resources we can build:
AWS management console,
AWS CLI
SDK (Python,Java,.net)
IAC--Infra as code 
AWS -Cloud formation (only for aws suport)
Terraform (you can build any infra any could enviornment ,AWS,oracl,Google,azure..etc)

What is Terraform and how it works?
Terraform is  an infrastructure as a code (IAAC) tool developed by Mitchel Hashimoto in 2014 .
It was developed in “GO” language. We use HCL (Hashicorp configuration language) to create the infra 
Terraform simplified muti-cloud deployment with a single tool

HCL language similar to Json language 

Why terraform (advantages)?
Terraform is a tool used to make infrastructure automation,it is free(but,not open source),easy to understand and platform independent.
It has many advantages
  • Reusability ,Time saving ,Automation ,Avoiding mistakes ,Multi cloud support 
Different IAAC tools/services available in the market?
AWS(Cloud information template),Terraform ,GCP(Deployment manager),Azure(ARM/Bicep),CHEF
Puppet,Cloudify,pulumi

Step1: Build infra using terraform, We use Ec2 for build infra 
Need create Ec2 instance in Aws using Default  Network setting 

Step2:  choose amazon linux, and te below commands 
https://developer.hashicorp.com/terraform/install#linux
sudo yum install -y yum-utils shadow-utils
sudo yum-config-manager --add-repo https://rpm.releases.hashicorp.com/AmazonLinux/hashicorp.repo
sudo yum -y install terraform
Installed:
  git-2.47.1-1.amzn2023.0.2.x86_64            git-core-2.47.1-1.amzn2023.0.2.x86_64       git-core-doc-2.47.1-1.amzn2023.0.2.noarch
  perl-Error-1:0.17029-5.amzn2023.0.2.noarch  perl-File-Find-1.37-477.amzn2023.0.6.noarch perl-Git-2.47.1-1.amzn2023.0.2.noarch
  perl-TermReadKey-2.38-9.amzn2023.0.2.x86_64 perl-lib-0.65-477.amzn2023.0.6.x86_64       terraform-1.11.4-1.x86_64
Complete!
Terraform Providers  (AWS,Azure,..),partner,community (they will give terrafrom code for reference)
https://registry.terraform.io/browse/providers
https://registry.terraform.io/browse/providers?tier=partner
https://registry.terraform.io/browse/providers?tier=community

Terraform Commands
terraform init 
terrafrom plan
terraform apply
terraform destroy
terraform state -list
terraform validate
terraform fmt 
terraform destroy -auto-approve

Step3: follow the below steps, prepared the script build the infra every instance has ami id 
Amazon machine image ID: ami-04e7764922e1e3a57 
for create instance need permission security admin ,Go to i am user take security key for user 

Creating IAM admin user
                           
Step4:
Add policy 
AdministratorAccess

Create access for Create access key choose below option check understand, click next 
and then create accesskey,access generate succesfully


Access key ID      Secret access key
AKIATFBMO7H4MQLOWPFY XENq4+tXP+d2YkSV6BRDWnwu+8Vd6ST1ZlE8Z0bF

Step5:
[root@ip-172-31-47-99 ccit]# mkdir ccit
[root@ip-172-31-47-99 ccit]# cat cloudinfra.tf
provider "aws"{
region="eu-west-1a"
access_key="AKIATFBMO7H4MQLOWPFY"
secret_key="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"

}
resource "aws_instance" "ccitinst" {
ami="ami-04e7764922e1e3a57"
instance_type="t2.micro"
}
Step6: Goto the directory where your created give terraform init, it will go to terrafrom provider that is aws take the latest version (package ,plugin )download automatically in your instance 
just for reference https://registry.terraform.io/providers/hashicorp/aws/latest

[root@ip-172-31-47-99 ccit]# terraform init
Initializing the backend...
Initializing provider plugins...
- Finding latest version of hashicorp/aws...
- Installing hashicorp/aws v5.97.0...
- Installed hashicorp/aws v5.97.0 (signed by HashiCorp)
Terraform has created a lock file .terraform.lock.hcl to record the provider
selections it made above. Include this file in your version control repository
so that Terraform can guarantee to make the same selections by default when
you run "terraform init" in the future.

Terraform has been successfully initialized!
Step7:Terraform plan  command it will given you the execution plan for the .tf file 
here it is failed plan itself region given Region  eu-west-1  name should a-z available zone only 3,so remove a execute plan again 
 
[root@ip-172-31-47-99 ccit]# terraform plan

Planning failed. Terraform encountered an error while generating this plan.

Error: invalid AWS Region: eu-west-1a
│   with provider["registry.terraform.io/hashicorp/aws"],
│   on cloudinfra.tf line 1, in provider "aws":
│    1: provider "aws"{

[root@ip-172-31-47-99 ccit]# terraform plan
Plan: 1 to add, 0 to change, 0 to destroy.

Note: You didn't use the -out option to save this plan, so Terraform can't guarantee to take exactly these actions if you run
"terraform apply" now.

[root@ip-172-31-47-99 ccit]# terraform validate
Success! The configuration is valid.
Step8:Terraform apply this build the infra, just confirmation it will approval yes /no given yes confirmation for build infra 
[root@ip-172-31-47-99 ccit]# terraform apply
Plan: 1 to add, 0 to change, 0 to destroy.

Do you want to perform these actions?
  Terraform will perform the actions described above.
  Only 'yes' will be accepted to approve.

  Enter a value: yes

aws_instance.ccitinst: Creating...
aws_instance.ccitinst: Still creating... [10s elapsed]
aws_instance.ccitinst: Creation complete after 12s [id=i-049509c279d3d43b6]

Apply complete! Resources: 1 added, 0 changed, 0 destroyed.
Step9:Successfully build infra


Step10: you see here new file created terraform.tfstate ,we can called state file it is very important it is connectivity between your resources ,track the changes for resource information about resource ,     don't do any manual changes on the file, if you want add any tag also through file and apply the changes
[root@ip-172-31-47-99 ccit]# ll
total 12
-rw-r--r--. 1 root root  220 May  1 20:45 cloudinfra.tf
-rw-r--r--. 1 root root 4808 May  1 20:49 terraform.tfstate
[root@ip-172-31-47-99 ccit]#vi cloudinfra.tf
Step11: tag name for instance ,
[root@ip-172-31-47-99 ccit]# terraform apply
provider "aws"{
region="eu-west-1"
access_key="AKIATFBMO7H4MQLOWPFY"
secret_key="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"
}
resource "aws_instance" "ccitinst" {
ami="ami-04e7764922e1e3a57"
instance_type="t2.micro"
tags={
Name="CCIT-TF"
  }
}
Plan: 0 to add, 1 to change, 0 to destroy.
Do you want to perform these actions?
  Terraform will perform the actions described above.
  Only 'yes' will be accepted to approve.
  Enter a value: yes
aws_instance.ccitinst: Modifying... [id=i-049509c279d3d43b6]
aws_instance.ccitinst: Modifications complete after 1s [id=i-049509c279d3d43b6]

Apply complete! Resources: 0 added, 1 changed, 0 destroyed.
See here just added tag for the instance 


Step12: see here it will preprent latest state of the file terraform.tfstate,backup is before what is state of infra
[root@ip-172-31-47-99 ccit]# ls -lrt
total 20
-rw-r--r--. 1 root root  250 May  1 21:06 cloudinfra.tf
-rw-r--r--. 1 root root 4808 May  1 21:07 terraform.tfstate.backup
-rw-r--r--. 1 root root 4896 May  1 21:07 terraform.tfstate
Step13: terraform apply -auto-approve (it will not ask you confirmation)
[root@ip-172-31-47-99 ccit]# terraform apply -auto-approve
Step14: below , format the structure all .tf files 
[root@ip-172-31-47-99 ccit]# terraform fmt
Step15:terraform destroy destroy the resource, it will destroy the instance which was we have created
 [root@ip-172-31-47-99 ccit]# terraform destroy -auto-approve
Plan: 0 to add, 0 to change, 1 to destroy.
aws_instance.ccitinst: Destroying... [id=i-049509c279d3d43b6]
aws_instance.ccitinst: Still destroying... [id=i-049509c279d3d43b6, 10s elapsed]
aws_instance.ccitinst: Still destroying... [id=i-049509c279d3d43b6, 20s elapsed]
aws_instance.ccitinst: Destruction complete after 30s

Destroy complete! Resources: 1 destroyed.
see nothing resource showing null there present tf file ,because you have destroyed the instance 
[root@ip-172-31-47-99 ccit]# cat terraform.tfstate
{
  "version": 4,
  "terraform_version": "1.11.4",
  "serial": 7,
  "lineage": "062265ed-0f8c-fd3d-4fc0-5474e2b01614",
  "outputs": {},
  "resources": [],
  "check_results": null
}

Step13 :Now created two instance our tf file need count 
  count =2

provider "aws" {
  region     = "eu-west-1"
  access_key = "AKIATFBMO7H4MQLOWPFY"
  secret_key = "XENq4+tXP+d2YkSV6BRDWnwu+8Vd6ST1ZlE8Z0bF"


}
resource "aws_instance" "ccitinst" {
  ami           = "ami-04e7764922e1e3a57"
  instance_type = "t2.micro"
  count =2
  tags = {

    Name = "CCIT-123"
  }

Step14:we need destroy particular instance ,use the command 
terraform state list  you see here ,we created same resouce ccitinst two instance that why came 0,2
[root@ip-172-31-47-99 ccit]# terraform state list
aws_instance.ccitinst[0]
aws_instance.ccitinst[1]
 You can do create instance like below also
resource "aws_instance" "ccitinst1" {
  ami           = "ami-04e7764922e1e3a57"
  instance_type = "t2.micro"
  tags = {
    Name = "CCIT-123"
  }
resource "aws_instance" "ccitinst2" {
  ami           = "ami-04e7764922e1e3a57"
  instance_type = "t2.micro"
  tags = {
    Name = "CCIT-1234"
  }
Step15:if you want delete particular instance give name target name enter
[root@ip-172-31-47-99 ccit]# terraform destroy -auto-approve -target=aws_instance.ccitinst[1]

Destroy complete! Resources: 1 destroyed.
Step16: Instance destroyed , every resource has unique identity you give that  it will destroy

Step17: Syntax  Resource name should be unique

provider "<<provider>>"{
region=""
}
resource "<resource type>>"  "<<resource name (logical name)>>"
 { <<arguments (configuration settings)>>
}

Step18: Alias ,using alias argument allow multiple configure same provider 
  • you can deploy resources in multiple Aws regions
  • you can deploy in multiple AWS accounts
  • you can deploy to different service providers(AWS,azure..etc)
Step19: aws configure command used for your AWS CLI credentials and default configuration
see below none, need to set use aws configure command 
[root@ip-172-31-47-99 ~]# aws configure list
      Name                    Value             Type    Location
      ----                    -----             ----    --------
   profile                <not set>             None    None
access_key                <not set>             None    None
secret_key                <not set>             None    None
    region                eu-west-1             imds

[root@ip-172-31-47-99 ~]# aws configure
AWS Access Key ID [None]: AKIATFBMO7H4MQLOWPFY
AWS Secret Access Key [None]: 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
Default region name [None]:
Default output format [None]:
See below now set the accesskey 
[root@ip-172-31-47-99 ~]# aws configure list
      Name                    Value             Type    Location
      ----                    -----             ----    --------
   profile                <not set>             None    None
access_key     ****************WPFY shared-credentials-file
secret_key     ****************Z0bF shared-credentials-file
    region                eu-west-1             imds


 Resource S3 Bucket Create using default profile password 
Step1: See below ,i have given any access key or secretkey ,we have mention profile default 
in the code, so that me we already set the password default above configuration it will take automatically
[root@ip-172-31-47-99 ccit]# cat cloudinfra.tf
provider "aws" {
  region  = "eu-west-1"
  profile = "default"
}
resource "aws_s3_bucket" "ccitbucket" {
  bucket = "ccit-apr2025"

}

[root@ip-172-31-47-99 ccit]# terraform plan
Plan: 1 to add, 0 to change, 1 to destroy.

Note: You didn't use the -out option to save this plan, so Terraform can't guarantee to take exactly these actions if you run
"terraform apply" now.

Step2: you see below 1 was destroyed ,due previous tf file has one instance ,we complete change to s3 bucket ,so that is the reason existing instance destroyed and create s3 bucket

Plan: 1 to add, 0 to change, 1 to destroy.
aws_instance.ccitinst[0]: Destroying... [id=i-0ee6f94dee0ed6f89]
aws_s3_bucket.ccitbucket: Creating...
aws_s3_bucket.ccitbucket: Creation complete after 1s [id=ccit-apr2025]
aws_instance.ccitinst[0]: Still destroying... [id=i-0ee6f94dee0ed6f89, 10s elapsed]
aws_instance.ccitinst[0]: Still destroying... [id=i-0ee6f94dee0ed6f89, 20s elapsed]
aws_instance.ccitinst[0]: Still destroying... [id=i-0ee6f94dee0ed6f89, 30s elapsed]
aws_instance.ccitinst[0]: Still destroying... [id=i-0ee6f94dee0ed6f89, 40s elapsed]
aws_instance.ccitinst[0]: Still destroying... [id=i-0ee6f94dee0ed6f89, 50s elapsed]
aws_instance.ccitinst[0]: Still destroying... [id=i-0ee6f94dee0ed6f89, 1m0s elapsed]
aws_instance.ccitinst[0]: Destruction complete after 1m0s
Apply complete! Resources: 1 added, 0 changed, 1 destroyed.
Step3:

Step4: Destroy the bucket 
[root@ip-172-31-47-99 ccit]# terraform destroy -auto-approve
aws_s3_bucket.ccitbucket: Refreshing state... [id=ccit-apr2025]
Destroy complete! Resources: 1 destroyed.

                Create Bucket multiple regions using profiles  aws configuration 
Step1:
to see the credentials physically default already exist ,we add new profile key ccit 
[root@ip-172-31-47-99 ccit]# vim ~/.aws/credentials
[root@ip-172-31-47-99 ccit]# cat ~/.aws/credentials
[default]
aws_access_key_id = AKIATFBMO7H4MQLOWPFY
aws_secret_access_key = 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

[ccit]
aws_access_key_id = AKIATFBMO7H4MQLOWPFY
aws_secret_access_key = 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

                       
Step2: you see below tf file mention profile name, because two regions plan to create bukets 

[root@ip-172-31-47-99 ccit]# vi  cloudinfra.tf
provider "aws" {
  region  = "eu-west-1"
  profile = "default"
}
provider "aws" {
  alias ="west2"
  region  = "eu-west-2"
  profile = "ccit"
}
resource "aws_s3_bucket" "ccitwest1bucket" {
  provider=aws
  bucket = "ccit-apr2025west1"
}
resource "aws_s3_bucket" "ccitwest2bucket" {
  provider=aws.west2
  bucket = "ccit-apr2025west2"

you see below plan is good adding 2 bucket apply now
[root@ip-172-31-47-99 ccit]# terraform plan
Plan: 2 to add, 0 to change, 0 to destroy.

Note: You didn't use the -out option to save this plan, so Terraform can't guarantee to take exactly these actions if you run
"terraform apply" now.

Step2: Successfully
[root@ip-172-31-47-99 ccit]# terraform apply -auto-approve
Plan: 2 to add, 0 to change, 0 to destroy.
aws_s3_bucket.ccitwest2bucket: Creating...
aws_s3_bucket.ccitwest1bucket: Creating...
aws_s3_bucket.ccitwest1bucket: Creation complete after 1s [id=ccit-apr2025west1]
aws_s3_bucket.ccitwest2bucket: Creation complete after 1s [id=ccit-apr2025west2]

Apply complete! Resources: 2 added, 0 changed, 0 destroyed


Step3:Now you see two buckets added different regions.
[root@ip-172-31-47-99 ccit]# terraform destroy -auto-approve
Plan: 0 to add, 0 to change, 2 to destroy.
aws_s3_bucket.ccitwest1bucket: Destroying... [id=ccit-apr2025west1]
aws_s3_bucket.ccitwest2bucket: Destroying... [id=ccit-apr2025west2]
aws_s3_bucket.ccitwest1bucket: Destruction complete after 0s
aws_s3_bucket.ccitwest2bucket: Destruction complete after 1s
Destroy complete! Resources: 2 destroyed.
Step4: Below reference for different providers 
 
                                      Terraform variables 
This variable 
bucket = "ccit-apr2025west2"

Step1: you see here given variable declared 
[root@ip-172-31-47-99 ccit]# cat cloudinfra.tf
provider "aws" {
  region  = "eu-west-1"
}
resource "aws_s3_bucket" "ccitwest1bucket" {
  bucket=var.s3bucket
}
 variable "s3bucket" {
    type=string
    default= "ccit-apr2025west1"

}
Step2:
[root@ip-172-31-47-99 ccit]# terraform apply -auto-approve

Step3: Bucket created 

                                                  --Thanks 

Saturday, April 26, 2025

Git Basic Commands

Git

Class 13th Git  Apr 26th Git (Global Information Tracker )

SDL (Software Development lifecycle)

1.Analysis  (Product Owner, Project Manager, Business Analyst, CTO (Chief technology officer)

2.Design(System Architect, System engineer)

3.Development (Front end dev, Backend dev, Devops)

4.Testing (QA, Tester, Devops)

5.Deployment (Admin, Devops)

6.Maintenance(Users,Testers,Support Managers )

These all project work end of the day it will store in the one repository maintained 

Above SDLC confirmation divided the scrums ,scrum master split the task into sprints 

All the source code maintained in central repository store ,that is version control tool, tracking the changes and rollback change feature it i will give you Git 

What is The version Control System ? & types

  • A version control system(VCS) is a tool that helps Softwate developers manage changes to source code over time
  • It keeps track of every modification to the code in a special kind of database.
  • Easy rollback compare to the earlier versions.

VCS Ensure that Developers can :
Collaborate without overwriting each other's work
Revert changes when errors occur.
Compare versions to see what change and why
Branch and merge to work on different feature independently

Type of Version control system
1. Local version control system (LVCS) :Single use not able to share
2. Centralized version control system (CVCS): Remark Always in internet always be available.
3. Distributed Version control system (DVCS) :99% using this System ,always internet not required

Popular Version control system:
Git (Global Information tracker, Git Hub, Gitlab,AWS CI/CD setup ,Bit bucket)

What is Git ?

  • In simple words,it is a distributed version control system(VCS).
  • High performance, Completed trackable and open-source tool
  • It can integrate with different other services like Jenkins,K8s,AWS CI/CD Setup,etc.
  • Github, and GitLab were developed on top of Git 

Different ways to use Git 
  • Command line interface(CLI)
  • GUI
  • Editors like visual Studio,visual Studio code,Eclipse etc.
Download Git 
https://git-scm.com/downloads/win
Git bash it will give you linux cmd line editor
Git has own database maintained backup
Commands
Git init (Initialize ,it means git will track the files by git ) 
 .git  (it hidden file once you go to project enter above command git will ready to track file from project)
Git add . (add all changed file to you repository local)
Git commit (this command will commit your changes to local repository)
Git Push (this command will push your change local to central git repository, you tell which origin you need move the file master or branch)
Git Stages :
Git has three main stages in its workflow.
1.Working directory (Untracked/Modified) Local
2.Staging area (index)    Local  Git add. 
3.Repository(committed)  Local Git commit 

Practice :
Step1:
Create one Project CCIT2025 public click create repository 

Step2:Clone the Project your local using using ssh key or http 
Step3:Prior to clone or commit the change to repository required to set global identity 

git config --global "vakati.subbu@gmail.com"
git config --global   "vakati.subbu"


Git Clone 
$ git config --global "vakati.subbu@gmail.com"
$ git config --global   "vakati.subbu"
vakati.subbu@gmail.com

$ git clone git@github.com:Vakatisubbu/CCIT2025.git
Cloning into 'CCIT2025'...
warning: You appear to have cloned an empty repository.

Git add 
Administrator@DESKTOP-AV2PARO MINGW64 /c/git_repos (master)
$ cd CCIT2025

Administrator@DESKTOP-AV2PARO MINGW64 /c/git_repos/CCIT2025 (main)
$ git add .

Git Status 
Administrator@DESKTOP-AV2PARO MINGW64 /c/git_repos/CCIT2025 (main)
$ git status
On branch main

No commits yet

Changes to be committed:
  (use "git rm --cached <file>..." to unstage)
        new file:   Evenodd.java

Git Commit 
$ git commit -m "evenodd"
[main (root-commit) 476f36c] evenodd
 1 file changed, 21 insertions(+)
 create mode 100644 Evenodd.java
Git Push 
$ git push origin
Enumerating objects: 3, done.
Counting objects: 100% (3/3), done.
Delta compression using up to 4 threads
Compressing objects: 100% (2/2), done.
Writing objects: 100% (3/3), 608 bytes | 202.00 KiB/s, done.
Total 3 (delta 0), reused 0 (delta 0), pack-reused 0 (from 0)
To github.com:Vakatisubbu/CCIT2025.git
 * [new branch]      main -> main
Step4:


Step5: Evenodd.jave file just removed some space see below git status showing modified 
$ git status
$ git status
On branch main
Your branch is up to date with 'origin/main'.
Changes not staged for commit:
  (use "git add <file>..." to update what will be committed)
  (use "git restore <file>..." to discard changes in working directory)
        modified:   Evenodd.java
no changes added to commit (use "git add" and/or "git commit -a")
Step6: it will add all changed file to local repistory
git add .

On branch main
Your branch is up to date with 'origin/main'.
Changes to be committed:
  (use "git restore --staged <file>..." to unstage)
        modified:   Evenodd.java
Step7:one more time commit 
 $ git commit -m "second commit"
[main d9ef6c9] second commit
 1 file changed, 1 insertion(+), 2 deletions(-)
Step8: it will give you all commits log history
$ git log --oneline
d9ef6c9 (HEAD -> main) second commit
476f36c (origin/main) evenodd
Step9: I have moved one more file Number.java moved local repository secondfile
Administrator@DESKTOP-AV2PARO MINGW64 /c/git_repos/CCIT2025 (main)
$ git status
On branch main
Your branch is ahead of 'origin/main' by 1 commit.
  (use "git push" to publish your local commits)
Untracked files:
  (use "git add <file>..." to include in what will be committed)
        Number.java
nothing added to commit but untracked files present (use "git add" to track)
Administrator@DESKTOP-AV2PARO MINGW64 /c/git_repos/CCIT2025 (main)
$ git add .
Administrator@DESKTOP-AV2PARO MINGW64 /c/git_repos/CCIT2025 (main)
$ git status
On branch main
Your branch is ahead of 'origin/main' by 1 commit.
  (use "git push" to publish your local commits)
Changes to be committed:
  (use "git restore --staged <file>..." to unstage)
        new file:   Number.java

Administrator@DESKTOP-AV2PARO MINGW64 /c/git_repos/CCIT2025 (main)
$ git commit -m "secondfile"
[main 5ddcc74] secondfile
 1 file changed, 11 insertions(+)
 create mode 100644 Number.java

$ git log --oneline
5ddcc74 (HEAD -> main) secondfile
d9ef6c9 second commit
476f36c (origin/main) evenodd
Step10: now i am removed file from local repostory 
$ git status
On branch main
Your branch is ahead of 'origin/main' by 2 commits.
  (use "git push" to publish your local commits)

Changes not staged for commit:
  (use "git add/rm <file>..." to update what will be committed)
  (use "git restore <file>..." to discard changes in working directory)
        deleted:    Evenodd.java
no changes added to commit (use "git add" and/or "git commit -a")
Step11: Git restore using below command ,it restore form git hub repository 
$ git restore .

$ git status
On branch main
Your branch is ahead of 'origin/main' by 2 commits.
  (use "git push" to publish your local commits)
nothing to commit, working tree clean

git grants token using we can able to push the change to other repository 

Administrator@DESKTOP-AV2PARO MINGW64 /c/git_repos/CCIT2025 (main)

$ git push origin

Enumerating objects: 8, done.

Counting objects: 100% (8/8), done.

Delta compression using up to 4 threads

Compressing objects: 100% (5/5), done.

Writing objects: 100% (6/6), 765 bytes | 382.00 KiB/s, done.

Total 6 (delta 1), reused 0 (delta 0), pack-reused 0 (from 0)

remote: Resolving deltas: 100% (1/1), completed with 1 local object.

To github.com:Vakatisubbu/CCIT2025.git

   476f36c..5ddcc74  main -> main


Friday, April 25, 2025

Linux Basic Commands

Class 12th S3 Linux Apr25th

Linux is kernel not operating system it will interact with user interface and system hardware components using Linux kernel amazon created amazon linux it is not Gui, Linux more secure less space occupied
compared to windows, window required 30 GB create VM but linux 8 GB is sufficient fast to access 
Linux flavor(Ubuntu , Redhat,SUSE Linux,Debian) these are available in AWS 
Amazon linux Ec2-user is administator user just Iam user super user is root 
Linux Directory Architecture
/ Root Directory

/bin  /bin stand for binary,and  its where essential command-line  programs(binaries) are stored 

/boot Boot loaded files (like the linux kernel)

/dev Device files (e.g.. /dev/sda, dev/null)

/etc system-wide configuration files

/home home directory for users (eg.. /home/ec2-user)

/lib  Essential shared library for binaries in /bin these shared libraries are dynamic libraries that provide code and data to programs at runtime 

/media mount point for removable media like USB

/mnt Temporary mount point for filesystems(can be used for manual mounts like EFS or s3)

/opt Operational or third-party software packages 

/root Home directory of the root user 

/srv data for services like FTP or webservers 

/tmp temproray files (cleared or reboot)

/proc virtual file system with process and kernel information 

/var variable data like logs(/var/log),mail,spool files 

System Commands

uname (Used for operation system information)

uname -r Display linux kernel version 

uname -a Displays all information about linux system information 

uptime Displays since how long the system has been running 

uptime -p Show uptime when system was up

uptime -s Show uptime different format

hostname Displays the hostname (private ip willshow)

hostname -i /hostname -I Displays the hostname with ip address

last reboot  Give the information last reboot

date Shows date and time 

date +"%d"  day of the month (01-31)

date +"%m%" month of the year (01-12)

date "+%y" last two digits of the year 

date "+%H" print hours (00-23)

date "+%M" print minutes(00-59)

date "+%S" print current seconds(00-60)

date "+%D" print current date(dd/mm/yy)

date "+%F" print full date(YYYY-MM-DD)

date "+%A" print day of the week 

date "+%B" print month of the year

timedatectl shows shich time zone (sudo timedatectl set-timezone Asia/Kolkata)

whoami current which user your

who current how many user connected 

curl ifconfig.me  it give public ip (c stand client url)

File Commands

touch file-name used to create a single file 

touch  f1 f2 f3 multiple file to create

touch file{1.10} create 10 files at time 

rm file   remove single file 

rm f1 f2 f3 remove multiple files 

rm file{1..5} used remove range of 5 file

rm -f Used remove forcefully 

rm -f * remove all files at time

Folder Level Operation 

mkdir FN used to create directory 

mkdir FN1 FN2 FN3 Used to create muliple directory 

mkdir FN{1..7} Used to create range of directories

touch FN/FN used to create file creating inside the folder 

mkdir -p FN/FN/FN used to create folders inside the folder

rmdir used remove empty directory only 

rmdir  * used to remove all empty directories 

rmdir -rf it will remove all file and including content folders

List files 

ll To see the files along the data

ls to only the file names

ls <<foldename>> list of file inside the folder 

ll -a  To see hiden files 

ll -r To see the files reverse order 

ll -t  To see the latest file top 

ll -ltr To list of file along listing format modified time ,newest first and then reverse order 

Edit and display in files 

vim <filename> To Write the data of the file 

cat  <filename>   To read the data of the file

tac <filename>  To display file data in reverse order 

rev <filename>  To reverse the content in the file

Save & Quit 

:w to save the file changes 

:wq save & quit 

:q quit the vim editor

:w! To Save changed forcefully

:q1 quit the file forcefully

:wq! save & quit forcefully

A Move the cursor to end of the file 

I Move the cursor to starting of the file 

O Create new line in the above of the cursor 

o Create new line in the below of the cursor 


Need to Git account, Git is centralized repository store the data ,it will help work multiple people same time ,usually company projects are private repositories 

                             --Thanks ---